How to Install PVC Exterior Shutters
Installation instructions are written by ShutterLand, a U.S. exterior shutter specialist with over two decades of hands-on experience mounting shutters on residential homes and commercial properties.
PVC exterior shutters can be installed with functional hardware to swing open and closed or mounted in a fixed position beside the window. Because PVC shutters are substantial and relatively heavy, proper support and spacing are especially important for a successful installation.
Functional PVC shutters require multiple points of contact with the building. A top and bottom hinge alone are not sufficient. Intermediate hinges and a lower shutter support help distribute the weight of the shutter and maintain proper alignment when the shutter is open.

Before installation, review the PVC exterior shutter measuring instructions and determine whether the shutters will be functional or stationary. The installation method affects shutter dimensions, hinge placement and hardware requirements.
These instructions apply to PVC louvered shutters, solid panel shutters, combination shutters and PVC board and batten shutters. PVC is also one of several materials available in the complete ShutterLand selection of custom exterior shutters.
PVC Shutter Points of Contact
Functional PVC shutters require several points of support between each shutter and the building. These contact points distribute the weight along the height of the shutter rather than allowing the shutter to hang primarily from the upper and lower hinges.
| Shutter Height | Minimum Functional Support |
|---|---|
| Under 84 inches | Top hinge + bottom hinge + 1 intermediate hinge + 1 lower support |
| 84 inches or taller | Top hinge + bottom hinge + 2 intermediate hinges + 1 lower support |
Every functional PVC shutter requires at least one intermediate hinge and a lower support. Larger or unusually wide shutters may require additional hardware beyond these minimum requirements.
The shutter dog and lower shutter support perform different jobs. A shutter dog or holdback restrains the shutter in the open position. The lower support makes contact with the bottom of the open shutter and helps carry its weight. Some hardware configurations incorporate the support at the shutter-dog mounting bolt, but the shutter must actually rest on the support when fully open.
Review the exterior shutter hinge guide for additional information about hinge styles, pintles and offsets.
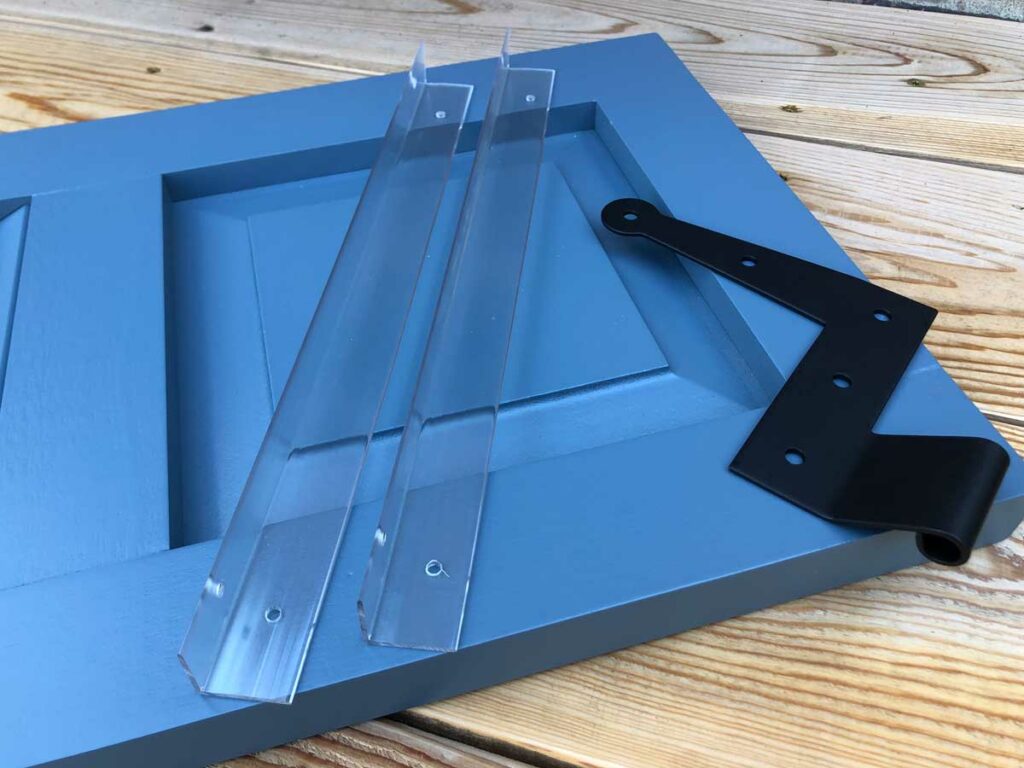
How to Install Functional PVC Exterior Shutters
- Check the shutter fit. Temporarily position the shutters over or within the window opening as determined during measuring. Use shims to establish even spacing around the perimeter and between the two shutters. Approximately 1/8 to 1/4 inch of clearance is generally needed for the shutters to swing without binding. For louvered shutters, the louvers should slope down and away from the window when the shutters are closed.
- Check the open position. Swing or temporarily position each shutter beside the window. Confirm that siding, trim, downspouts, masonry or other projections will not prevent the shutter from opening fully.
- Plan every point of contact. Before drilling, determine the location of the top hinge, bottom hinge, required mid-hinge or mid-hinges, and lower shutter support. Painter’s tape can be used to mark the hardware locations. Do not install PVC shutters using only top and bottom hinges.
- Attach the hinges to the shutter. Place the shutter face-up on sawhorses or another stable work surface. Position the top and bottom strap or New York-style L-hinges so the vertical portion aligns with the shutter edge and the horizontal portion aligns with the appropriate rail. Install the mid-hinge at approximately the center of the shutter or in alignment with a divider rail when appropriate. Shutters 84 inches or taller require two mid-hinges.
- Position the pintles. Return the shutter to the window with assistance and place it in the intended closed position. Position the lower pintle through the lower hinge barrel and mark its mounting location. Level the shutter and repeat the process with the upper pintle. Then locate the pintle or mounting point for each required mid-hinge.
- Secure the pintles to the building. Remove the shutter without changing the marked hardware positions. Fasten the pintles securely to the window casing, framing or other suitable structural mounting surface. The appropriate fastener and preparation will depend on whether the exterior is wood, siding, brick, masonry or another material. Uneven surfaces may require shims behind plate-mounted pintles.
- Hang and test the shutter. Place the shutter back onto the pintles. Confirm that it hangs level, swings freely and clears surrounding trim and siding. Check the closed position as well as the fully open position before installing the remaining hardware.
- Install the lower shutter support and shutter dog. Swing the shutter fully open. A typical shutter dog is positioned approximately one-quarter of the shutter width inward from the outside edge. Install the hardware so the shutter can be restrained in the open position while the lower support makes contact with the bottom of the shutter and helps carry its weight. The support is an important structural point of contact for PVC shutters; it should not be treated solely as decorative hardware. Learn more about shutter dog placement and installation.
- Install the opposite shutter. Repeat the process for the second shutter, maintaining consistent spacing and hardware placement. When the shutters are closed, confirm that the pair meets evenly without binding.
- Complete the installation. Install any remaining pulls, bolts, locks or other exterior shutter hardware. Operate the shutters several times and confirm that all hinges and supports remain securely engaged.
Why PVC Shutters Need Additional Support
PVC shutters are constructed from substantial components and weigh considerably more than lightweight decorative vinyl shutters. When a functional shutter is open, its weight projects away from the hinge line and places continuous load on the hardware.
Intermediate hinges distribute that load along the height of the shutter. The lower shutter support creates another load-bearing contact point and prevents the hinges from carrying the entire weight of the open shutter.
PVC also naturally expands and contracts as outdoor temperatures change and becomes more flexible as temperatures rise. Adequate operating clearance and multiple support points help maintain proper shutter position through changing conditions.
How to Install PVC Shutters in a Fixed Position
PVC shutters that do not need to open and close can be installed with sturdy V-shaped mounting brackets. The brackets support the shutter beside the window while maintaining separation between the shutter and the exterior wall.
This mounting method avoids pulling the PVC shutter flat against the siding and provides support at the top and bottom of the shutter. Taller shutters receive additional side support.
Prepare the Mounting Brackets
The long upper and lower brackets extend across most of the shutter width.
Using a 1/4-inch drill bit, drill two holes along one side of each bracket approximately 1-1/2 inches from each end. Drill two additional holes on the opposite side, also approximately 1-1/2 inches from each end. Slightly offset opposing holes so the screws will not intersect.
PVC shutters over 55 inches tall use additional smaller side brackets. Drill one mounting hole on each side of the smaller brackets, with the holes offset from one another.
Install the Bottom Bracket
Temporarily position the shutter beside the window at the intended height and location.
Center the lower bracket beneath the shutter. Remove the shutter, mark the mounting locations and pre-drill the wall as required for the exterior material.
Secure one end of the bracket, use a level to establish the correct position, then fasten the opposite end.
Brick, stone and other masonry installations require appropriate masonry fasteners or anchors.
Install the Top Bracket
Place the shutter on the lower bracket and position it where it will ultimately be installed.
Position the upper bracket over the shutter and mark the mounting locations. Remove the shutter, secure one end of the bracket, level it and fasten the opposite end.
Return the shutter to the brackets and confirm the fit. Slight tension between the upper and lower brackets can help hold the shutter securely.
Pre-Drill the PVC Shutter
Mark each location where a bracket screw will enter the top or bottom of the shutter.
Remove the shutter and pre-drill each location with a 5/32-inch drill bit to a depth of at least 1 inch.
Pre-drilling is important. Driving a screw directly into the PVC without a pilot hole can damage or split the material.
Return the shutter to the brackets and install the shorter screws into the pre-drilled holes. Make the final turns with a hand screwdriver to avoid over-tightening.
For shutters over 55 inches tall, install the additional side brackets using the same general method.
Installing PVC Bahama Shutters
PVC Bahama shutters use a different mounting system from side-hinged shutters. A Bahama shutter mounts horizontally above the window with a top hinge and is held outward from the building with support arms.
Use the dedicated Bahama shutter installation instructions for this shutter style.
Tools for Installing PVC Exterior Shutters
Typical installation equipment includes a sturdy ladder, drill, appropriate drill bits, tape measure, level, marking pencil, screwdriver, ratchet or wrench set, suitable exterior fasteners and any required masonry anchors or pintle shims.
Exact tools and fasteners depend on the shutter hardware, installation method and exterior building material.
Check PVC Shutters After Installation
Operate functional PVC shutters several times after installation. Confirm that each shutter remains level, swings without binding and is supported at every required contact point.
With the shutter fully open, verify that the lower support is making contact with the bottom of the shutter and actually carrying part of its weight. Periodically inspect hinges, supports and fasteners as part of normal exterior shutter care and maintenance.
Proper installation allows PVC exterior shutters to combine substantial construction with either functional operation or a fixed installation beside the window.
Frequently Asked Questions About Installing PVC Shutters
How many hinges do PVC exterior shutters need?
PVC shutters less than 84 inches tall require at least an upper hinge, lower hinge and one intermediate hinge. Shutters 84 inches tall or greater require an upper hinge, lower hinge and two intermediate hinges. Functional PVC shutters also require a lower support.
Do PVC shutters need a shutter dog?
A shutter dog or holdback is commonly used to restrain functional shutters in the open position. The shutter also needs a lower support that makes contact with the bottom of the shutter and helps carry its weight.
Can PVC shutters be installed with butt hinges?
Yes. Butt hinges can be appropriate for some recessed or inset installations when sufficient mounting depth and a suitable structural attachment surface are available. The required intermediate support points still need to be incorporated into the hinge arrangement.
Can PVC exterior shutters be installed permanently beside a window?
Yes. PVC shutters can be installed in a fixed position with sturdy mounting brackets when functional operation is not required.
Do PVC shutters expand and contract?
Yes. PVC naturally expands and contracts as temperatures change and can become more flexible in warm conditions. Proper operating clearance and adequate support help accommodate normal material movement.
Should fixed PVC shutters be screwed flat against the wall?
The fixed-mount method described here uses brackets that support the shutter and maintain separation between the shutter and the exterior wall rather than pulling the shutter tightly against the siding.